

Mini test, other cases
By diverting its system functions to another use, it can, instead of being used for its original purpose of a questionnaire, also be used for mini tests or other purpose.
The basic method of use is the same as a Questionnaire, so refer to that explanation.
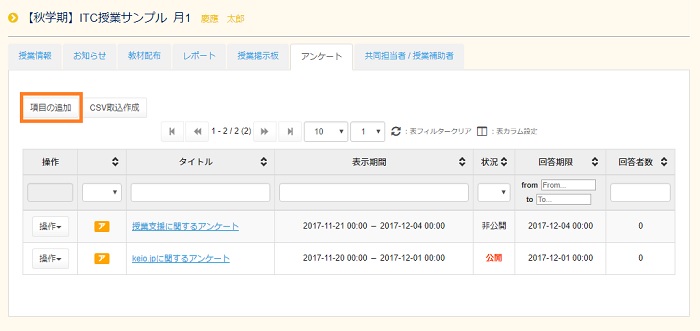
Mini test
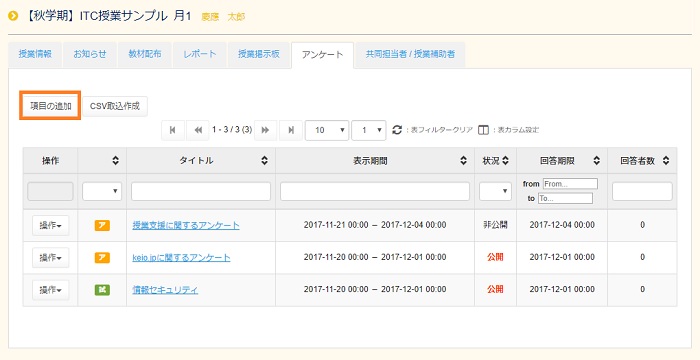
To set a mini test, press the [Add content] button on the Questionnaire screen.
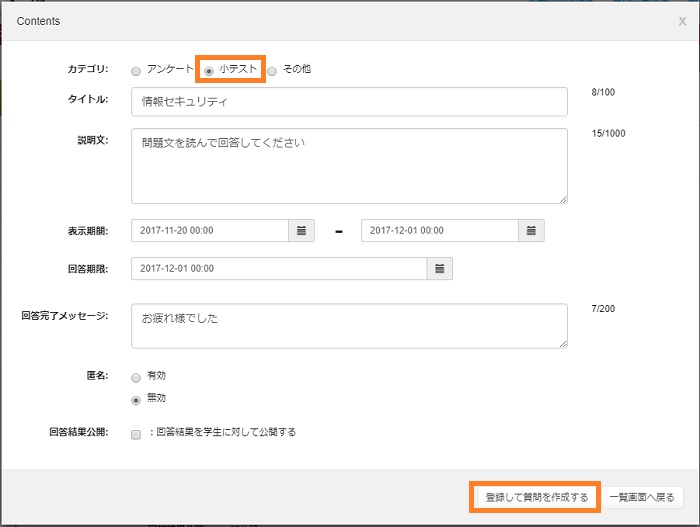
The Contents screen opens.Select [Mini test] in the category box.
Enter the other item in the same way as registration of a Questionnaire.Because basically it is a mini test, anonymity should be [Disable], answer results are not available to students.
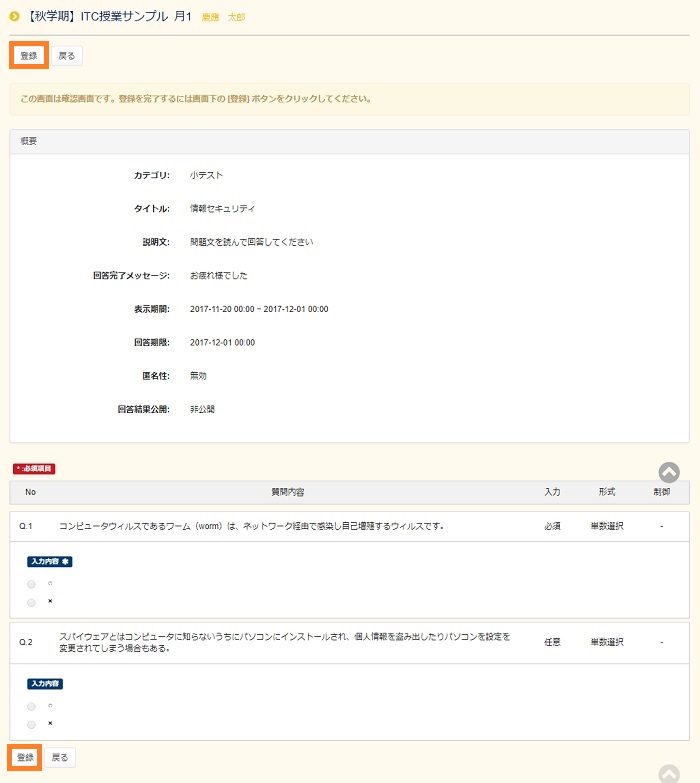
If you will not make any revisions etc. to the contents displayed, press the [Fix and Create questions] button on the lower left of the screen.
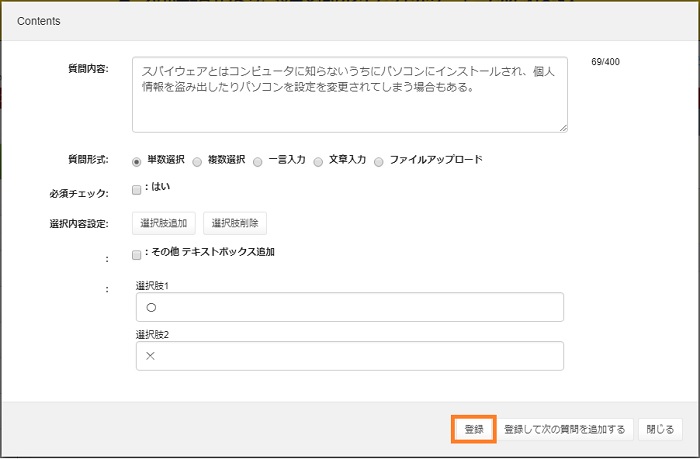
The Contents setting screen is displayed, so set each item in the same way as the Questionnaire.Please look here for question preparation method.
When there are no more questions, press the [Register] button.When there are more questions, click the [Fix and Add other question] button.
If you will not make any revisions etc. to the contents displayed, press the [Fix and Create questions] button on the lower left of the screen.
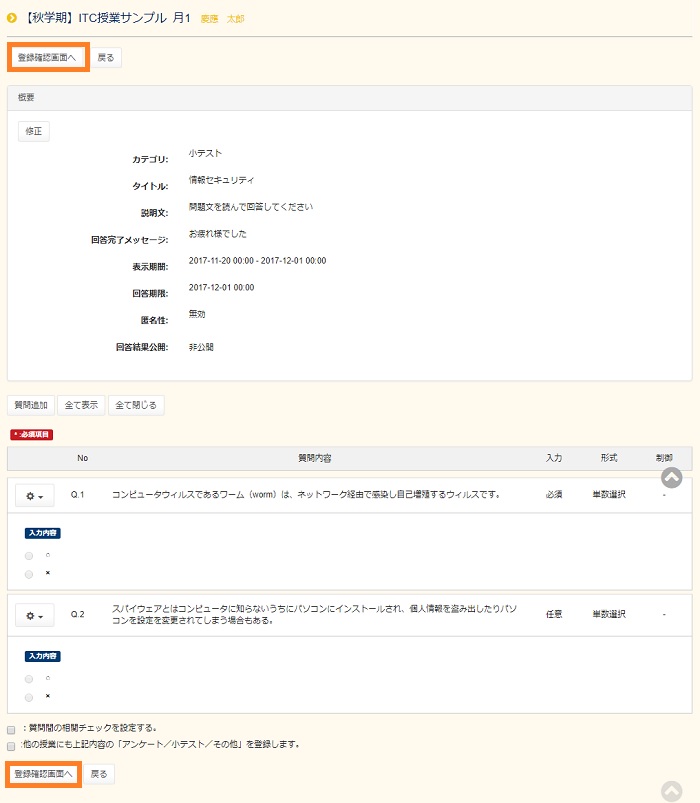
The Mini test registration confirmation screen is displayed.Confirm, and if there is no problem, press the [Register] button on the lower left of the screen.
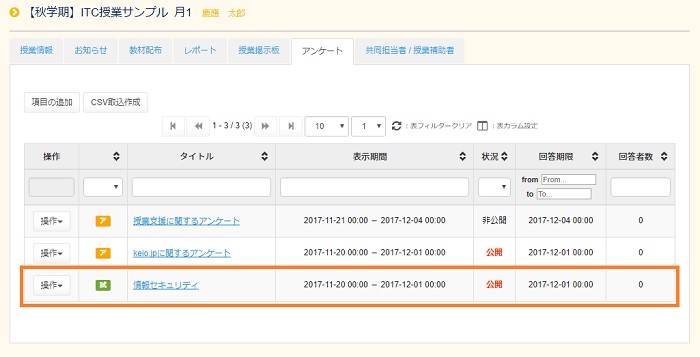
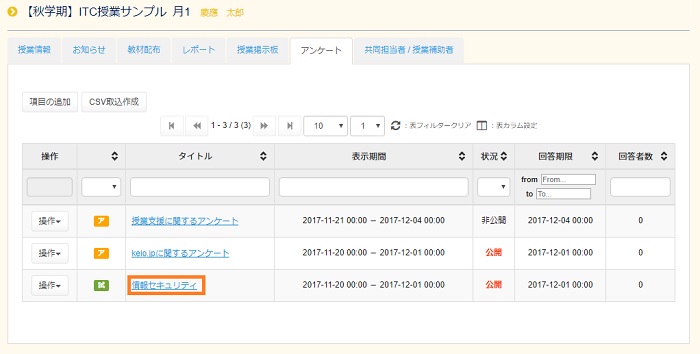
Check to make sure that any mini test with the [T] mark in the green square is added on the Questionnaire list.
Confirming mini test answer
Confirming answers
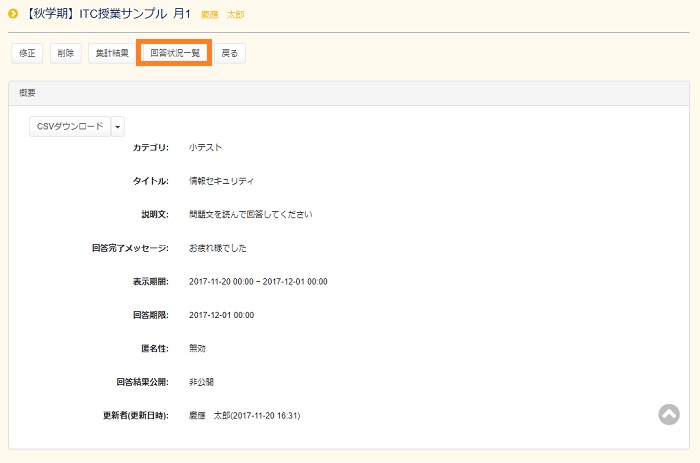
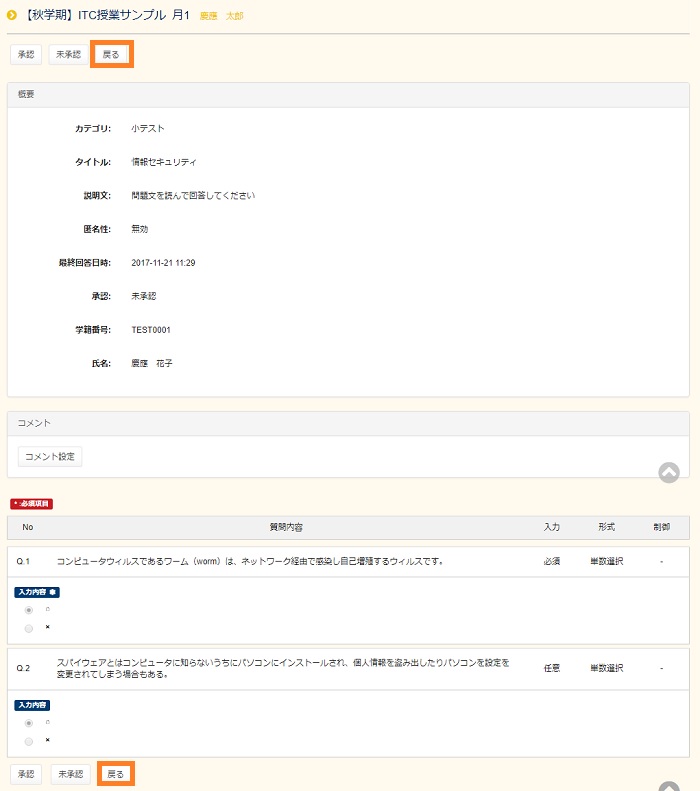
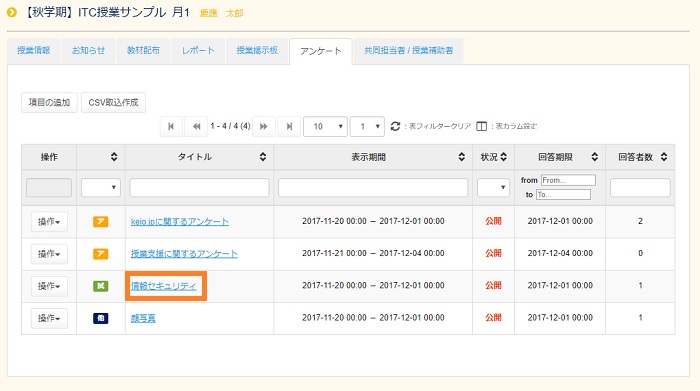
When you select the corresponding mini test title, the Mini test details screen opens.Click the [Answer status list] button on the bottom of the screen.
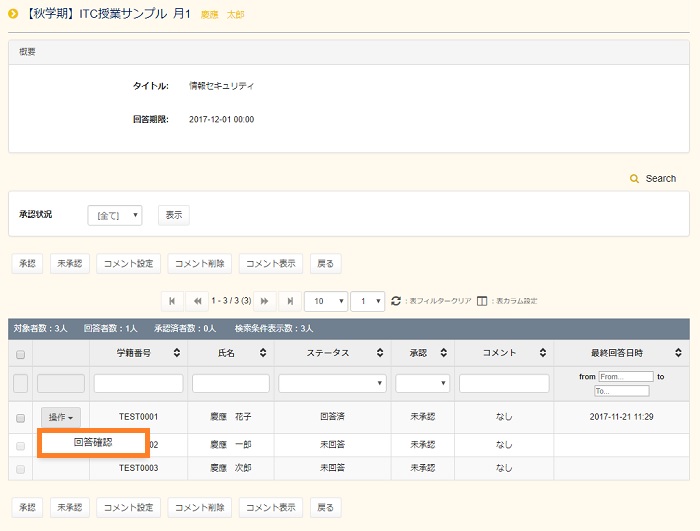
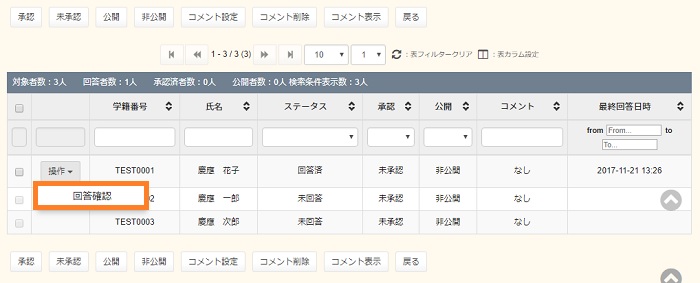
The Answer status list screen is displayed.Click the operation [Confirm] of the operation box of the corresponding answer.
The Answer details confirmation screen opens.After confirming, press the [Back] button on the lower left of the screen.
Approving answers
※If Anonymity is set, the confirmation task itself cannot be performed, so this function cannot be used.
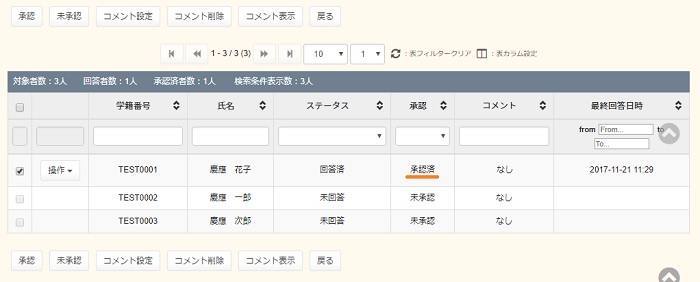
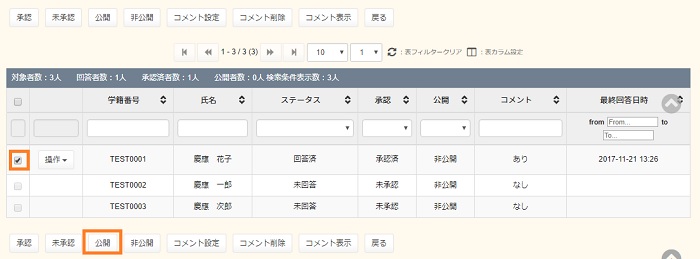
If there is no problem in answers, enter a check at the corresponding Questionnaire and press the [Approve] button.After you have approved the answers, students cannot revise the answers.
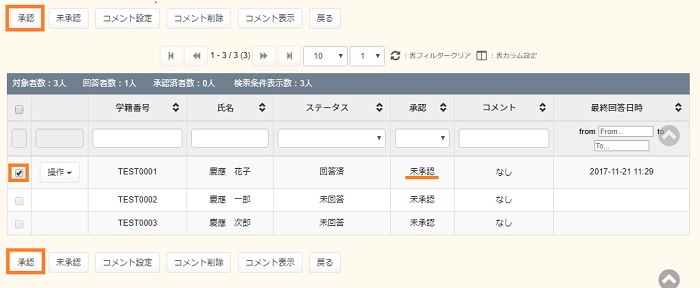
The [Approve] box changes to [Approved].
When the student has been told to correct the answer again, enter a check at the corresponding Questionnaire and press the [Non-approved] button.
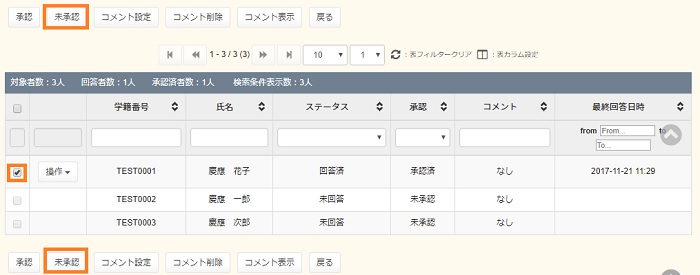
The [Approve] box changes to [Non-approved].
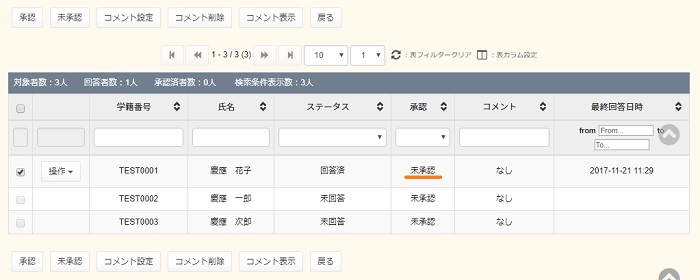
Entering comments
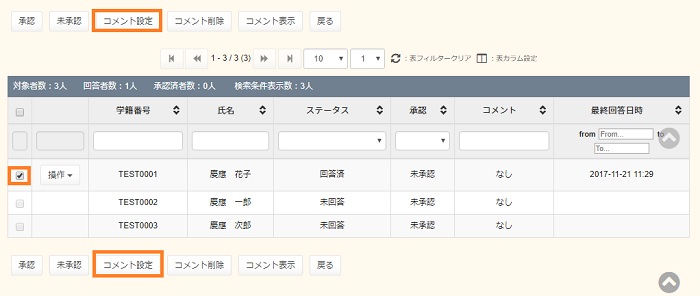
To enter a comment, enter a check at the answer that is the object of the comment, and click the [Set comment] button.
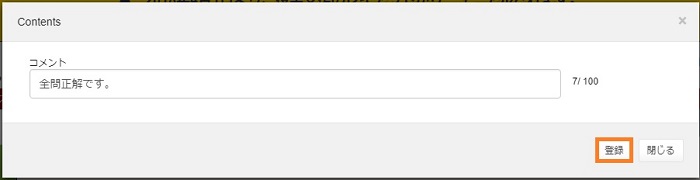
The Set comment window is displayed, so enter the comment and press the [Register] button.
Because Questionnaire functions are diverted to this use, correct answers or scores cannot be displayed.
If you wish to tell students a correct answer or the score, enter it in the comment.
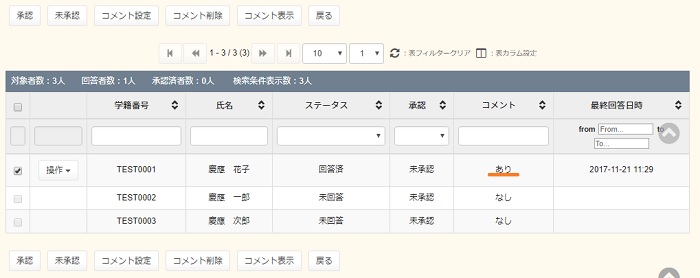
Make sure the [Comment] box changes to [Exist].
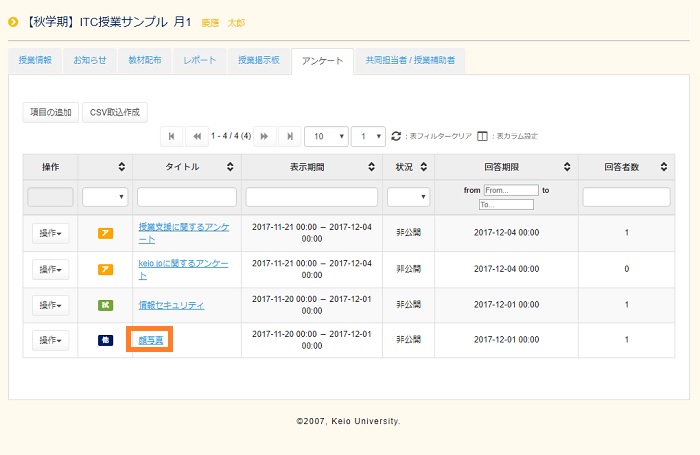
Results of totaling answers
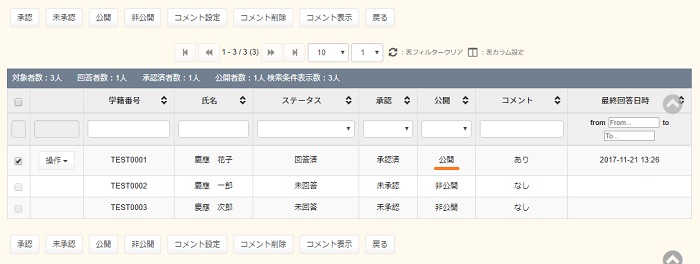
In the column on the right, the number of answerers is inserted. You can confirm this number by clicking the title.Or select [Result] from [Operation].
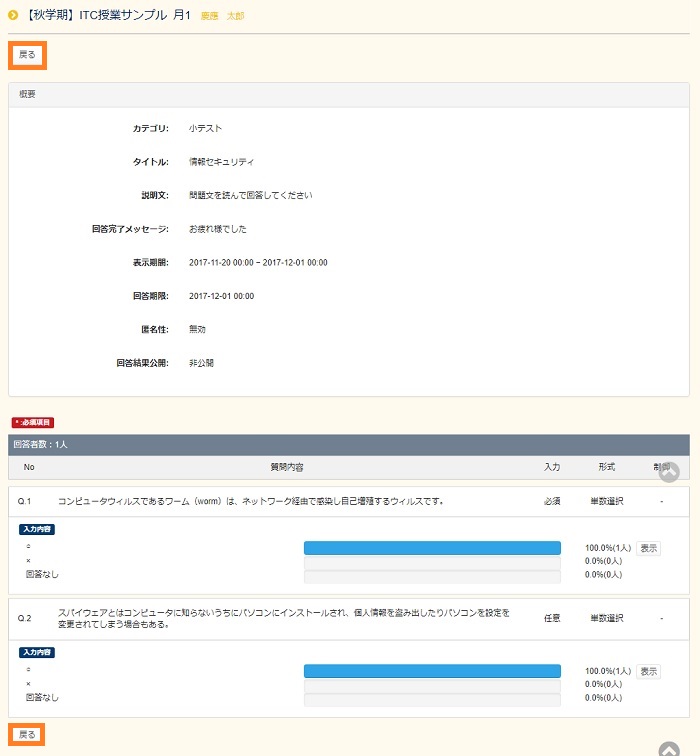
The Details screen opens.Click [Result] button on the lower left of the screen.
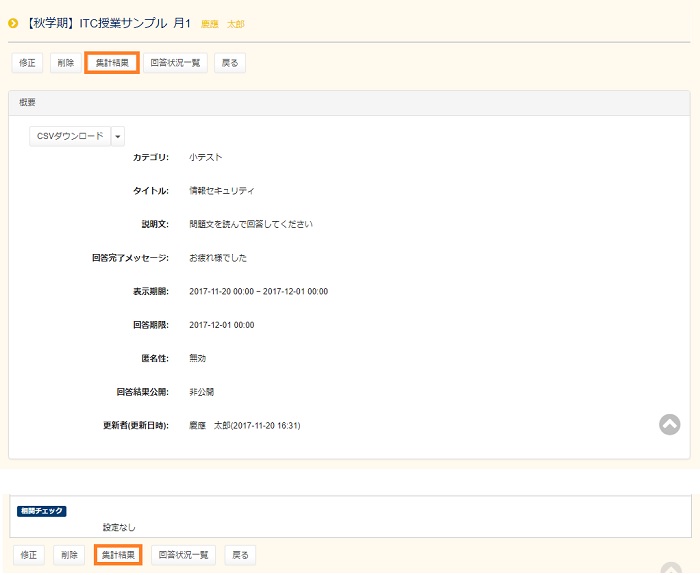
The [Answer result data] screen opens.After checking the Report of totaling results, press the [Back] button on the lower left of the screen.
Saving submitted files
To pick out the CSV file of the results of response of the minitest and the uploaded files, select [Save] from operation on the left of the corresponding Questionnaire title. Please Look here for the method.
Others
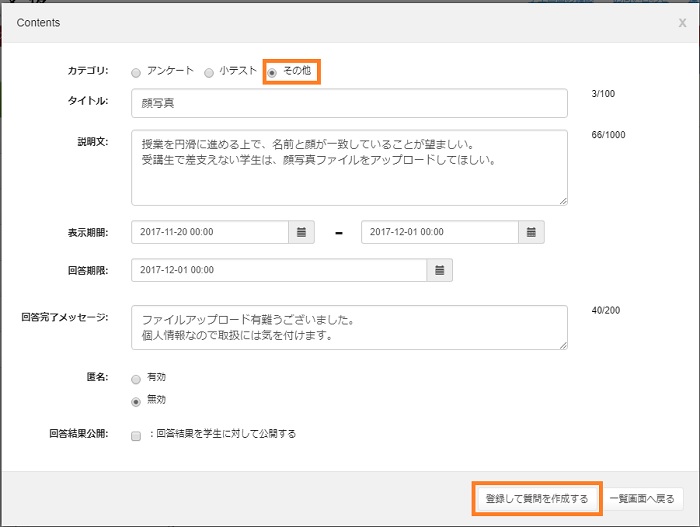
To set an item of Others, press the [Add Content] button on the Questionnaire top page.
The Contents screen opens.Select [Other] in the category box.
Also enter other items in the same way as when setting a Questionnaire.After completing entry, press the [Fix and Create questions] button.
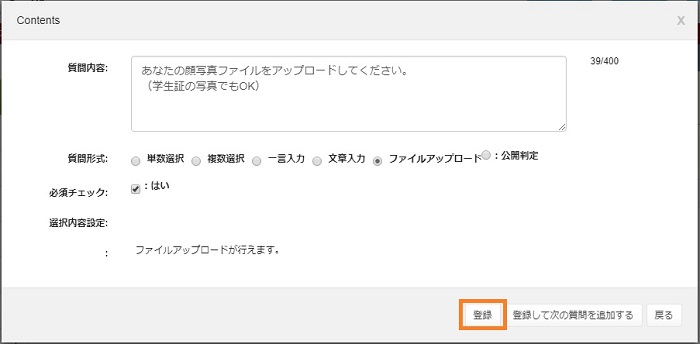
The Contents setting screen is displayed, so set each item in the same way as the Questionnaire.Pleaselook here for question preparation method.
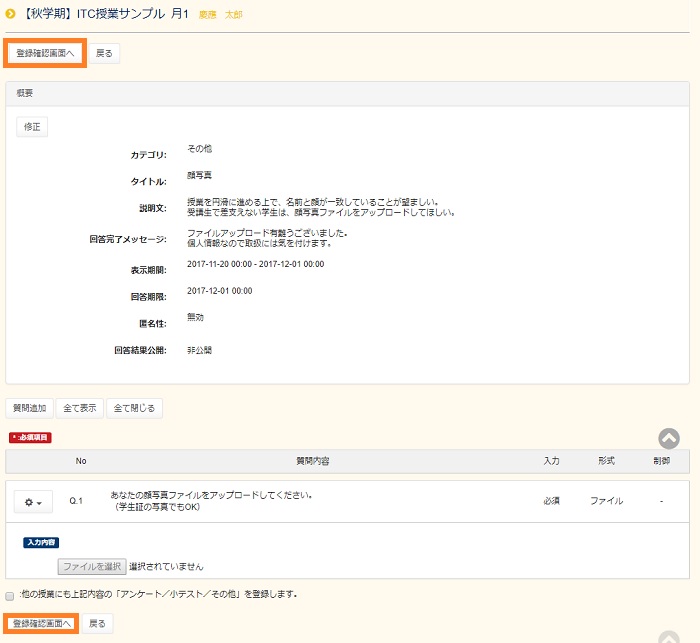
When there are no more questions, click the [Register] button.
When there are more questions, click the [Fix and Add other question] button.
If you will not make any revisions etc. to the contents displayed, press the [Fix and Create questions] button on the lower left of the screen.
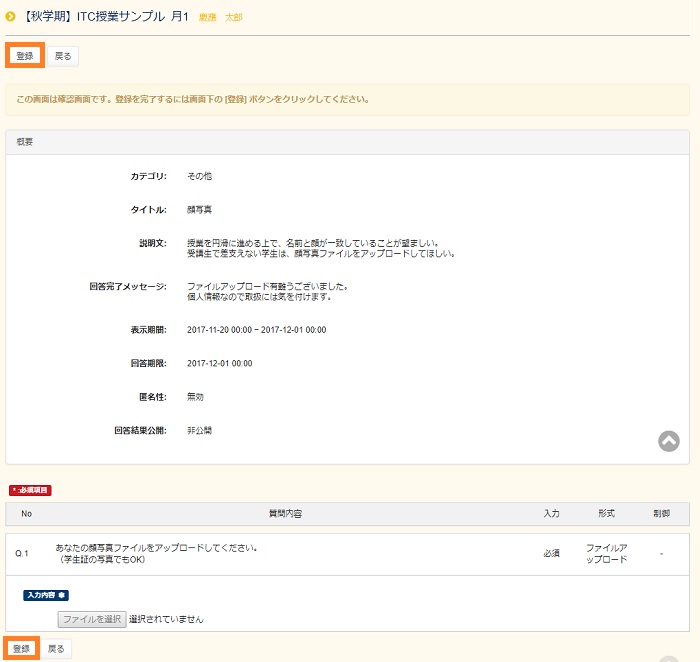
The Registration screen is displayed.
Confirm, and if there is no problem, press the [Confirm] button on the lower left of the screen.
Confirm that the title of the [Other] mark in the blue square is added to the Questionnaire list.

Others, Confirming answers
In the column on the right, the number of answerers is inserted. You can confirm this number by clicking the title.
[Answer status list] screen opens, so click [Confirm] from [Operation] of the corresponding Questionnaire.
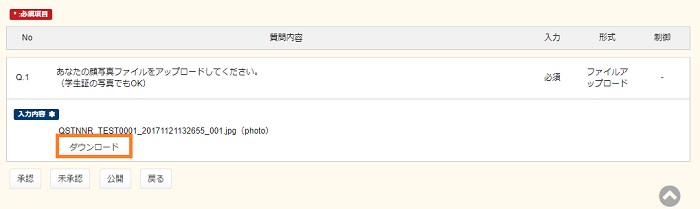
The [Answer details confirmation] screen opens.You have asked to submit the file, so click the [DL] button on the answer contents box to download.
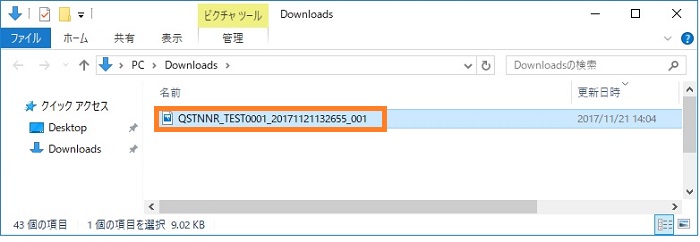
You will be asked whether to open or save the file, so press the [Save] button.

After the message, [Download has been completed.] has been displayed, press the [Open folder] button.

Check to make sure the file is saved.
To release answer contents in a case where they are used in the papers, enter a check at the corresponding response, and click the [Open] button.
The Open column in the answer details list will change to [Open].
Reference functions
-
Please look here if you wish to download all answers.
-
Please look here if you wish to see results.
-
Please look here if you wish to approve answers.
-
Please look here if you wish to set comments in the same way as in the case of a mini test.
Multiple confirmations of Questionnaire (mini tests, others)
If under mini test or other, a Questionnaire is prepared, all persons in charge are registered as advisor. However, the approval can be confirmed by one of these advisors.If you wish to change this approval procedure, please execute “Multiple approval setting revision”.
This is the setting procedure when multiple advisors will approve a Questionnaire.Approval can be confirmed by approval of one of the advisors or by all advisors.
※This function can be set only in cases where a Questionnaire has been prepared for mini test or for others.
A mini test or other is prepared by the Questionnaire function.The mini test or other prepared is edited.Please press the title of the corresponding mini test or other.
The list of advisors is displayed in the center of the screen.If you wish to change the approval method, please press the [Change] button.

Select the advisors, and then select the approval method (by one or all of the advisors), and finally press the [Register] button.

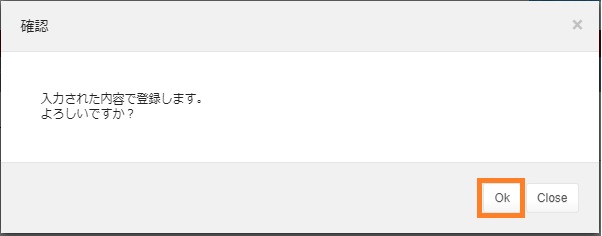
A confirmation message will be displayed, so press [OK].
The changes are reflected.

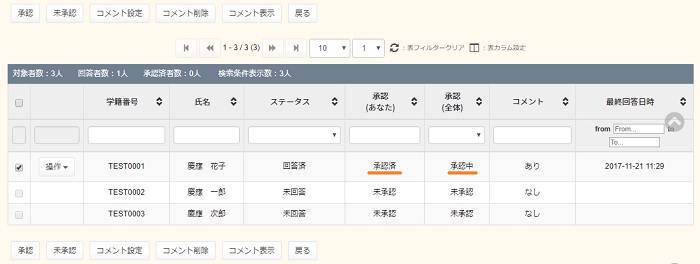
If all advisors have been set, when you personally approve, the approval (Self) box becomes "Approved". But when other advisors haven't approved yet, the approval (All) box becomes "In progress".And when all advisors approved, the approval (All) box becomes "Approved".
Last-Modified: June 20, 2019
The content ends at this position.