

Example of Becky! IMAP settings(OAuth)
Introduction
Contents of this manual are "Operation Confirmation" under the following environment.
Software: Becky(2.81.03)
OS: Windows10 (64bit)
Please perform the following procedure.
Please perform the following procedure.
When setting up, you will need to log in to keio.jp. Please check your Keio ID and password in advance
.
Procedure: setting under Becky
- Start Becky
-
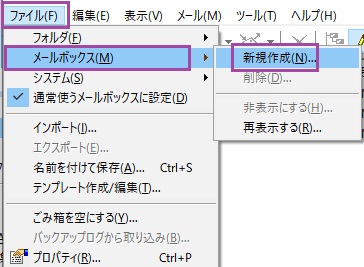
Click "File" → "mailbox" → "New preparation".
-
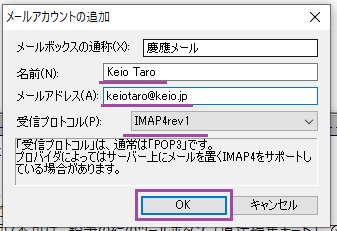
Enter the required information in the "Add email account" screen.
Explanation of items added to email accountName of mailbox Optional. Example:keio mail Name Enter the name that is the sender of the email.(Optional) Email address Enter Keio ID
Example) keio-taro@keio.jp
Precaution: Always be sure to enter in state also including after "@mark".Receiving protocol IMAP4rev1 -
Click "OK" after entering each item.
-
Click "OK".
-
Please refer to the information below to set up your email account.
Server's host name Port SSL Verification method Receiving server IMAP imap.gmail.com 993 SSL/TLS automatic detection Sending server SMTP smtp.gmail.com 465 SSL/TLS automatic detection User name Enter Keio Apps ID.
Example)keio-taro@keio.jp
Precaution: enter including state after @mark. -
After entering the IMAP server, check the IMAPS checkbox and click "OK" on the pop-up.
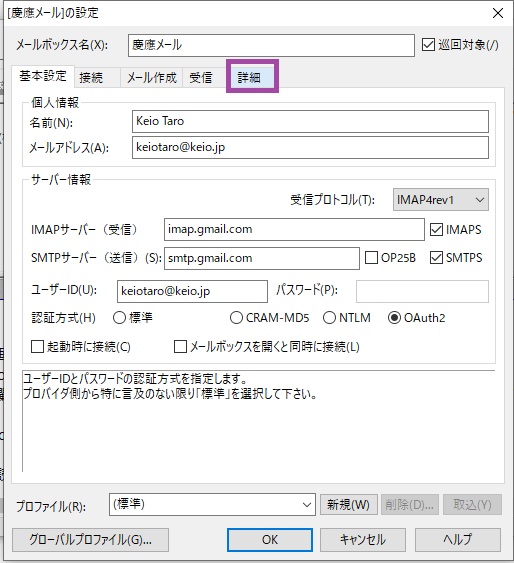
After entering the SMTP server name, uncheck OP25B, then check SMTPS, and click "OK" on the pop-up window.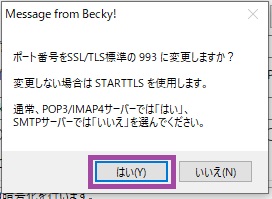
For OAuth2 provider selection, select "Gmail" and click "OK".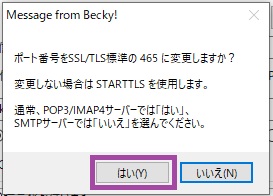 Once you have completed the input, select the "Details" tab.
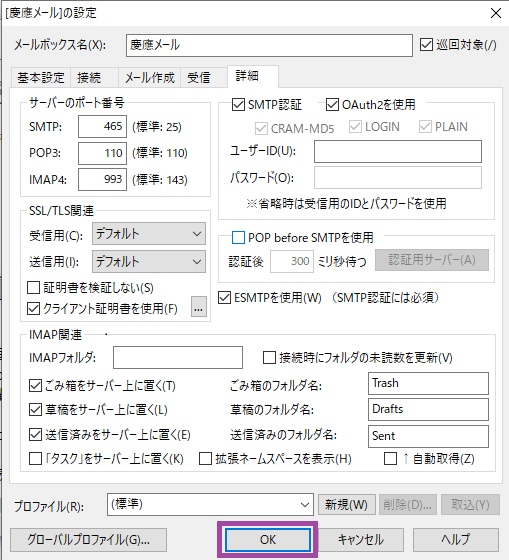
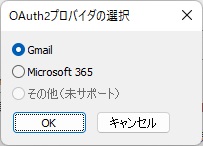
-
Confirm that there are no problems with the displayed port number, etc., check the SMTP authentication checkbox, and click "OK".
-
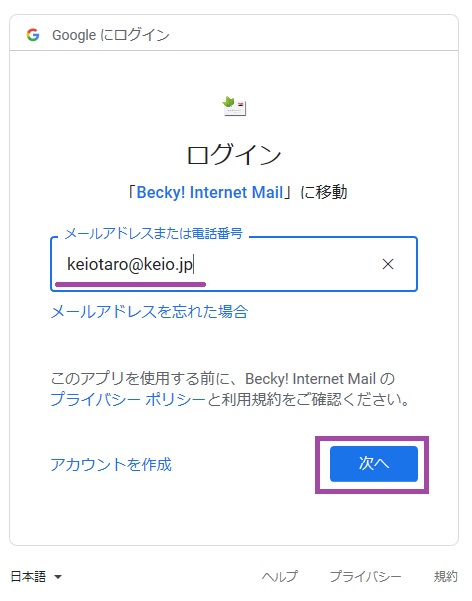
The Google login screen will be displayed in your default browser. Enter your Keio ID (e.g. keiotaro@keio.jp) and click "Next".(Please enter your Keio ID [xxxxx@keio.jp])
- The keio.jp authentication screen will be displayed, so please log in.
-
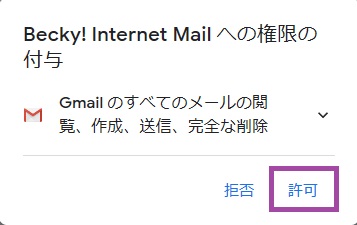
You will be asked to grant permission, so click "Allow".
-
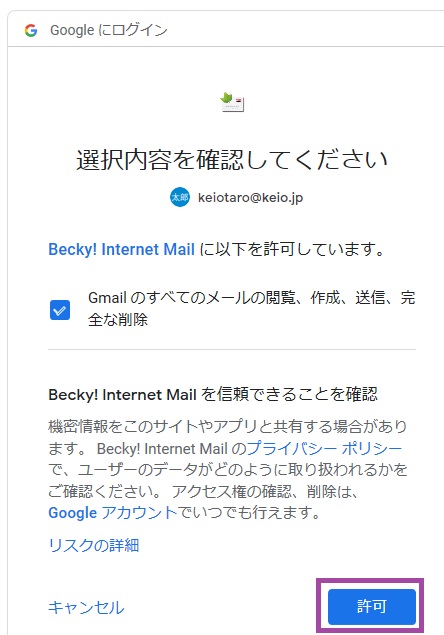
You will be asked to access your Google account, click "Allow".
-
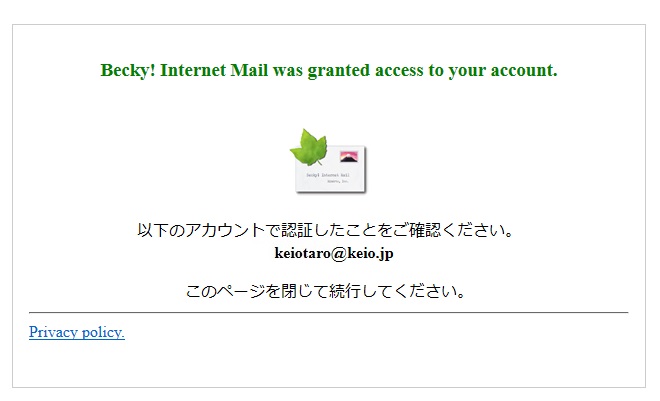
Please check the display and close the page if there is no problem.
- Please check that you can send and receive emails.
Revision History
2020/03/31: First created
2022/08/23: Image Update
Last-Modified: July 8, 2025
The content ends at this position.